Post-Quantum DePIN Testnet Installation Guide
Create the Naoris Protocol Wallet
Step 1
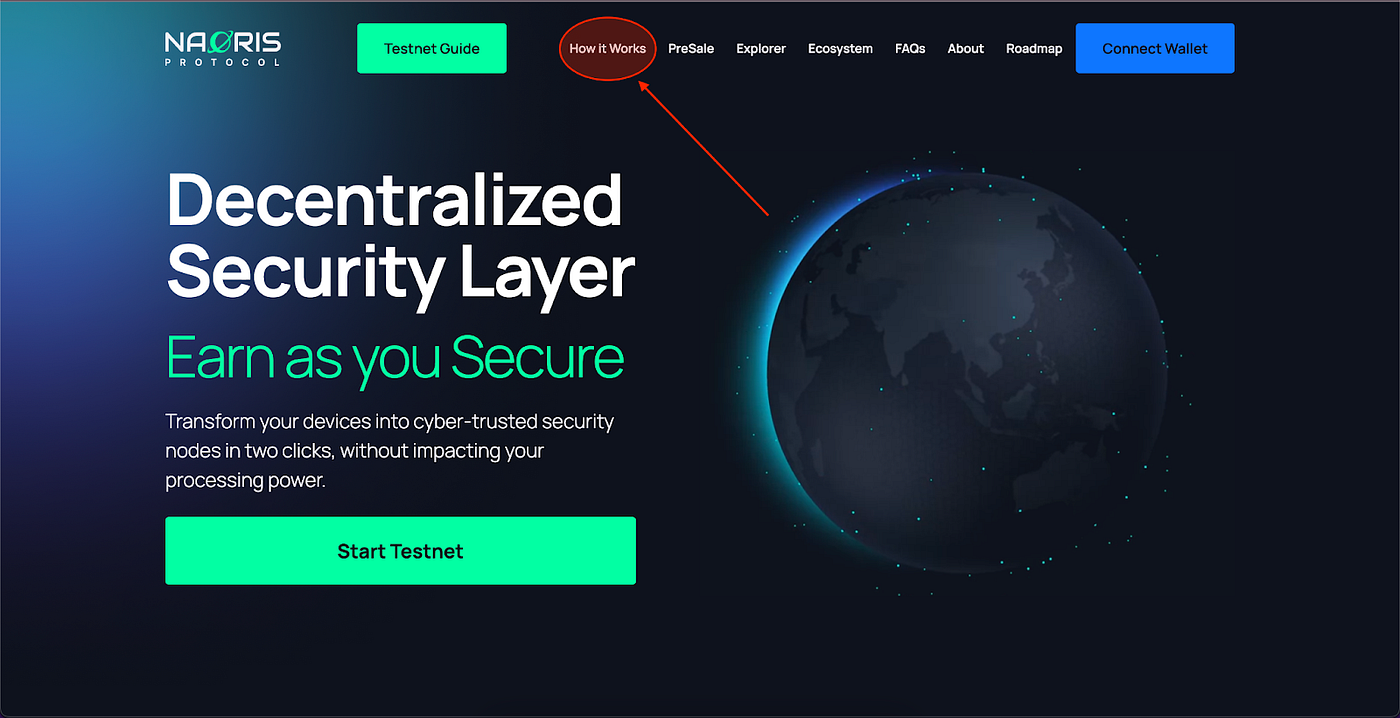
Go to the Naoris Protocol Testnet website at https://naorisprotocol.network/testnet and click ‘How It Works’ in the navigation bar.
Step 2
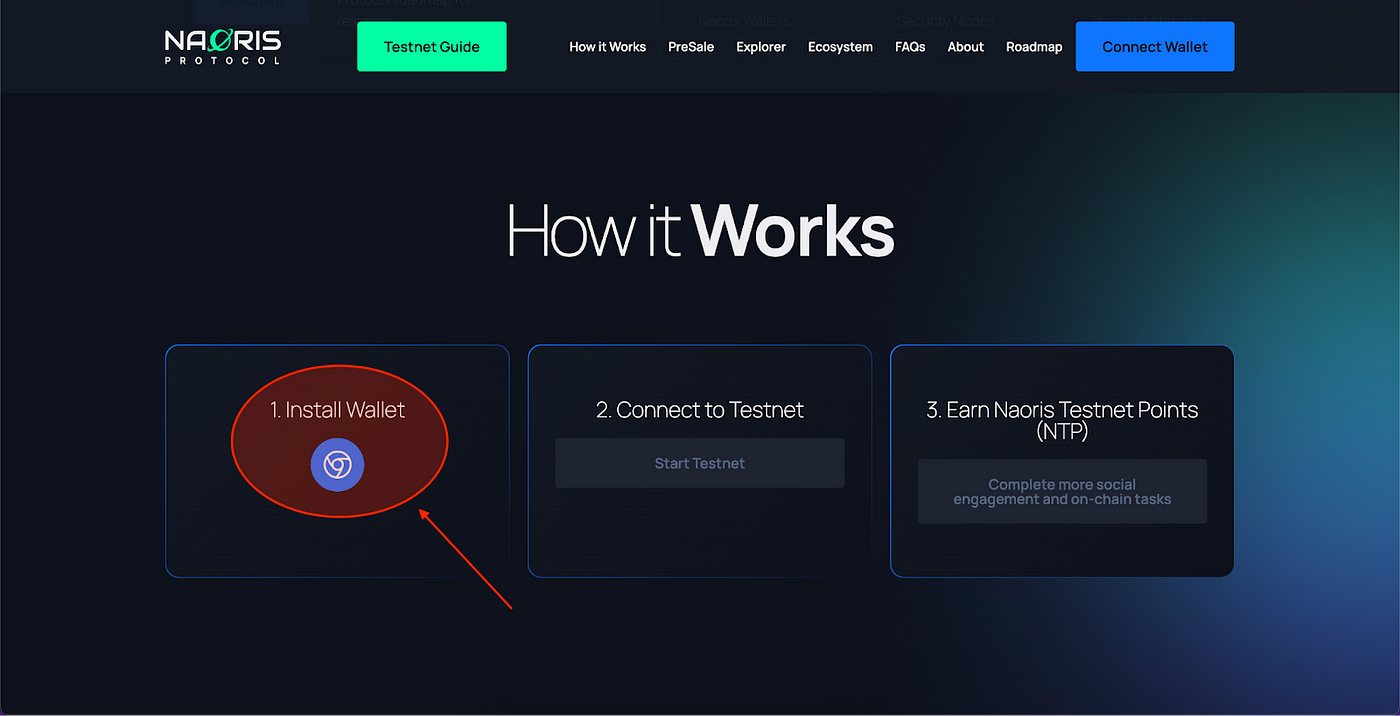
Click ‘Install Wallet’ in the “How It Works” section.
Step 3
Click ‘Add To Chrome’ in the Naoris Wallet Chrome Web Store Page.
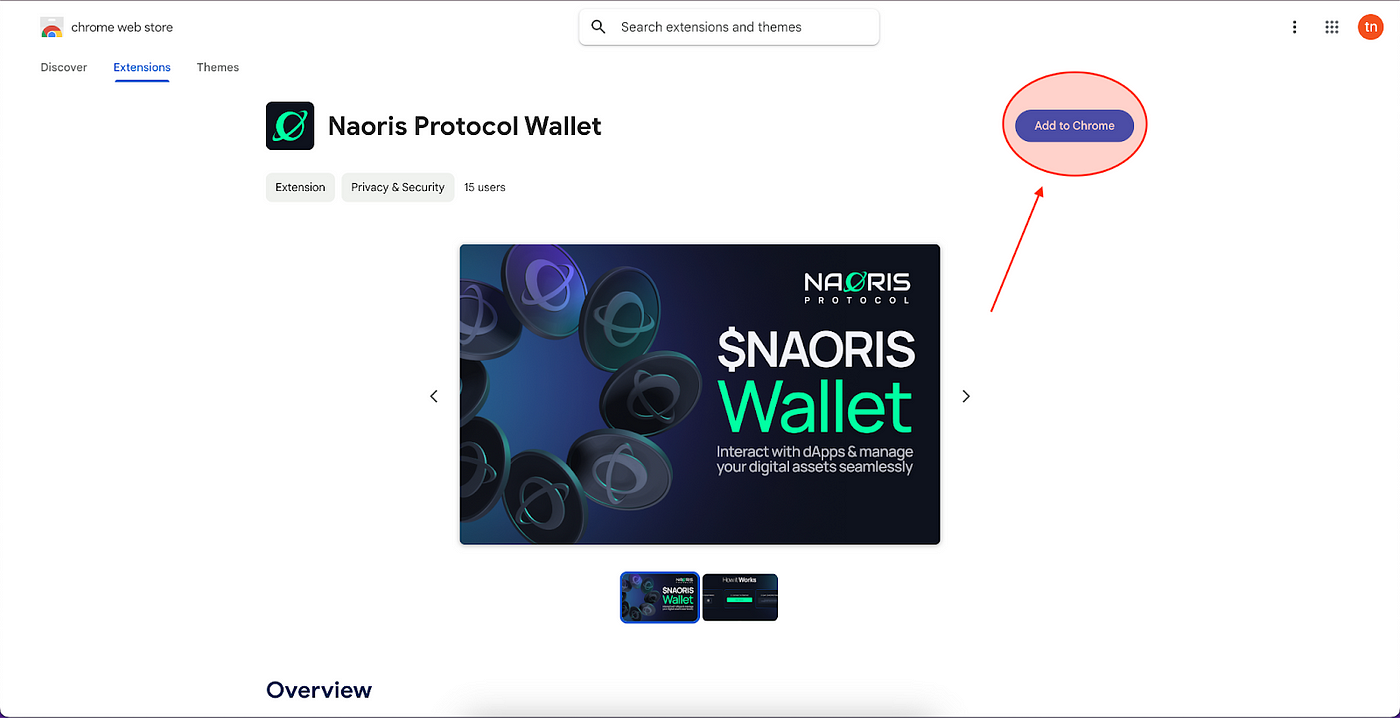
Step 4
Click ‘Add Extension’ in the Naoris Wallet Chrome Web Store Page.
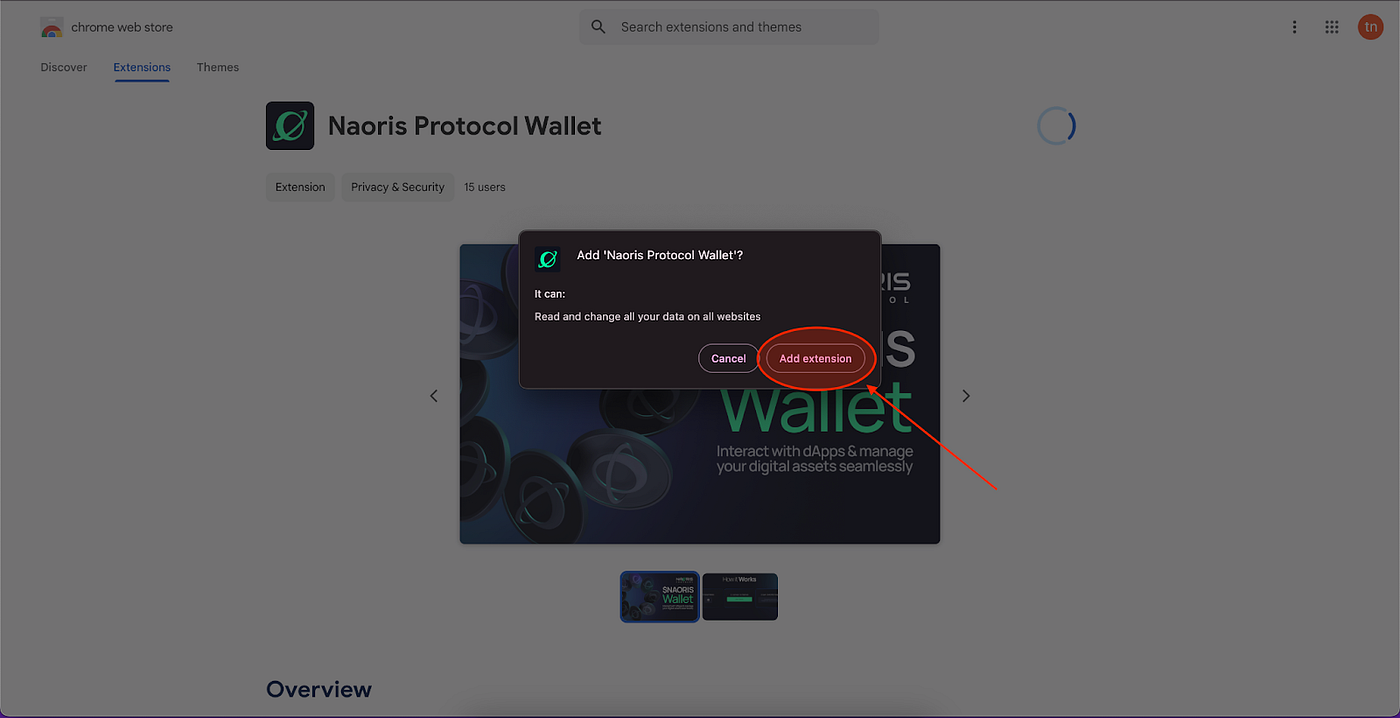
Step 5
Click ‘Create a New Wallet’.
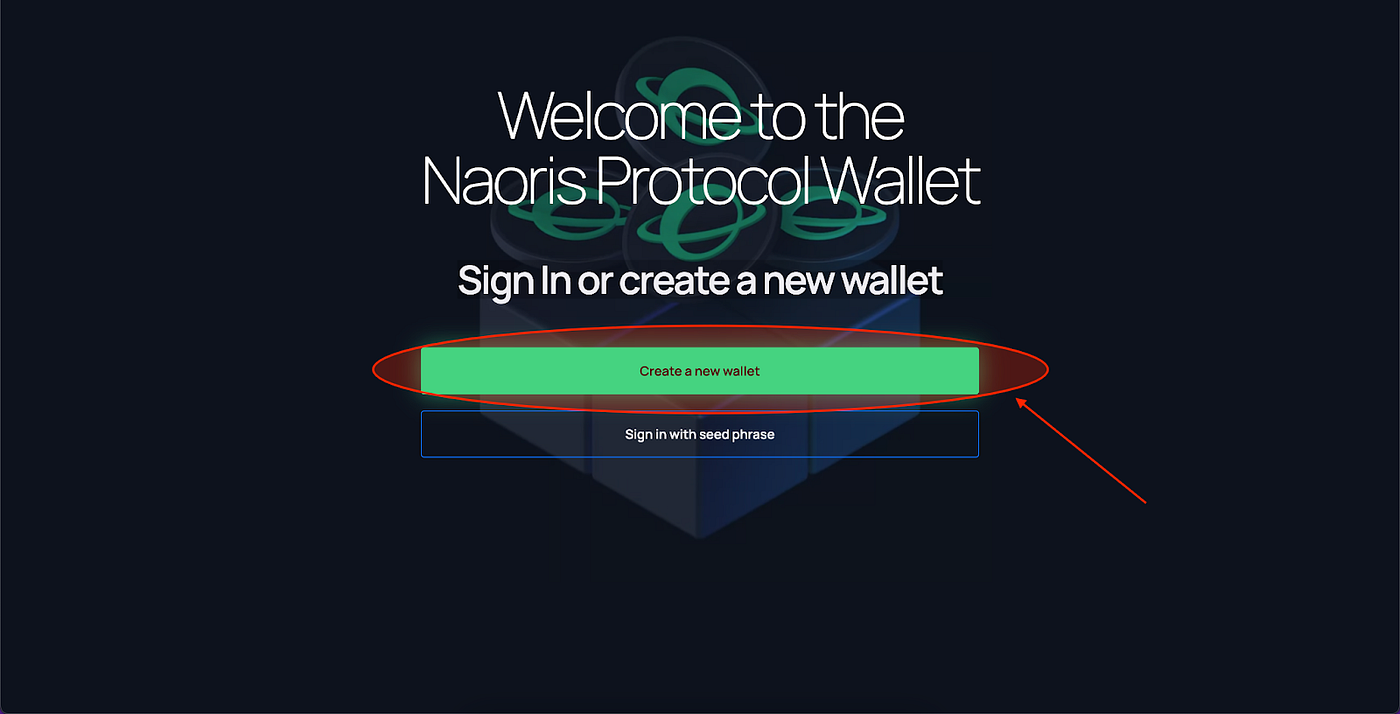
Step 6
Read and Sign the Privacy Policy & Terms of Service.
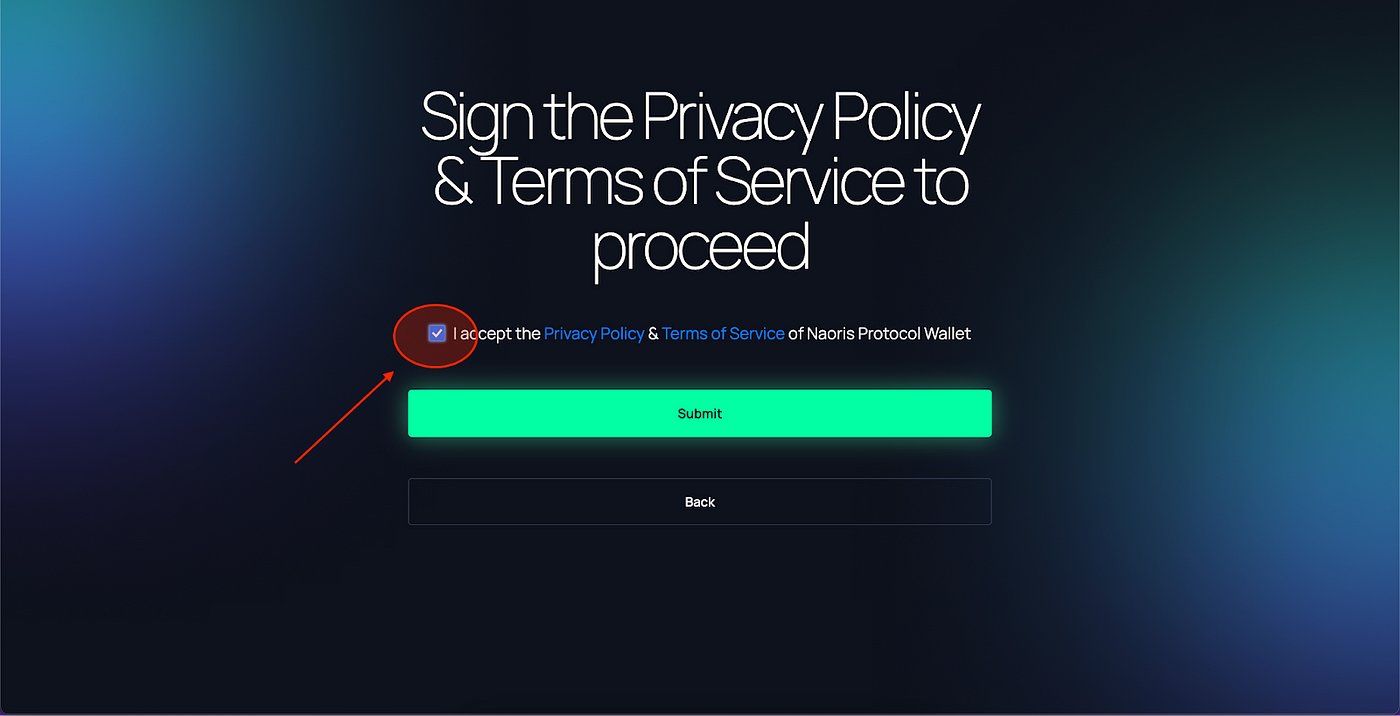
Step 7
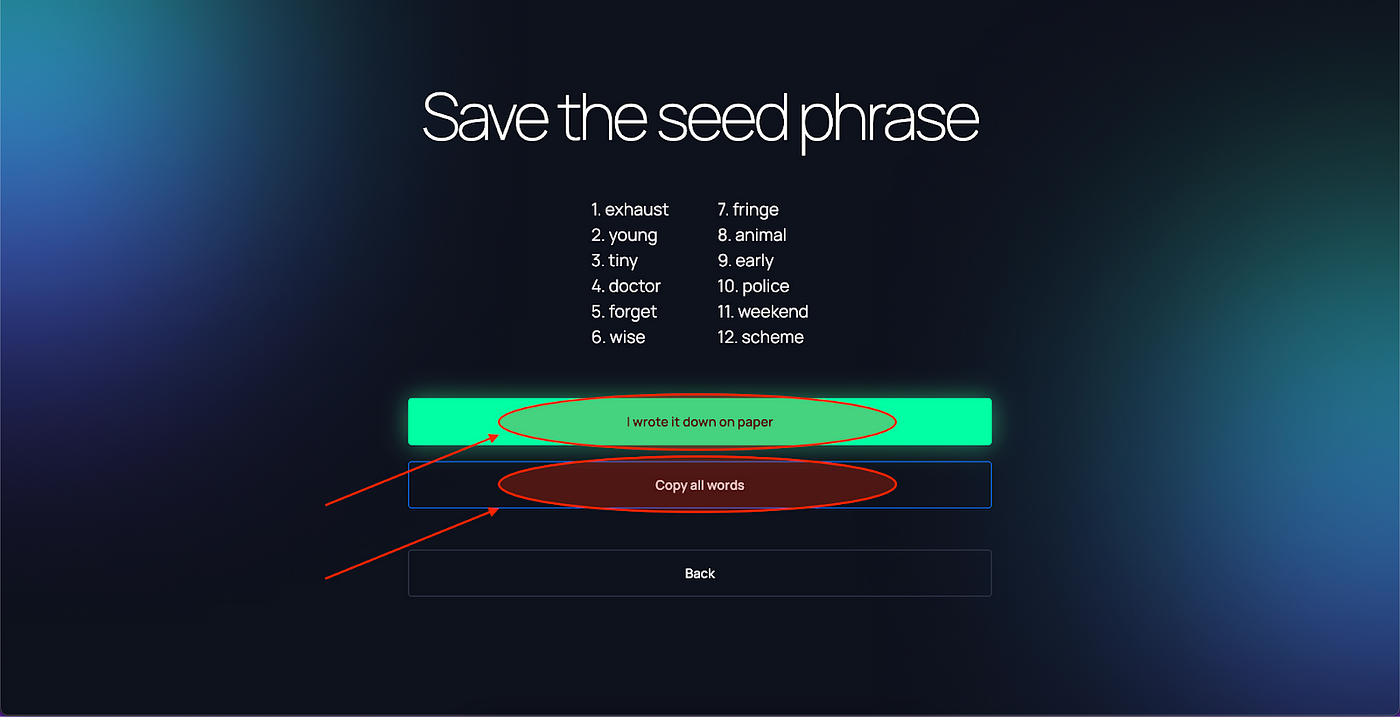
Copy the seed phrase and keep it in a safe place. Click ‘Copy All Words’ then click ‘I Wrote It Down On Paper’ to proceed.
Step 8
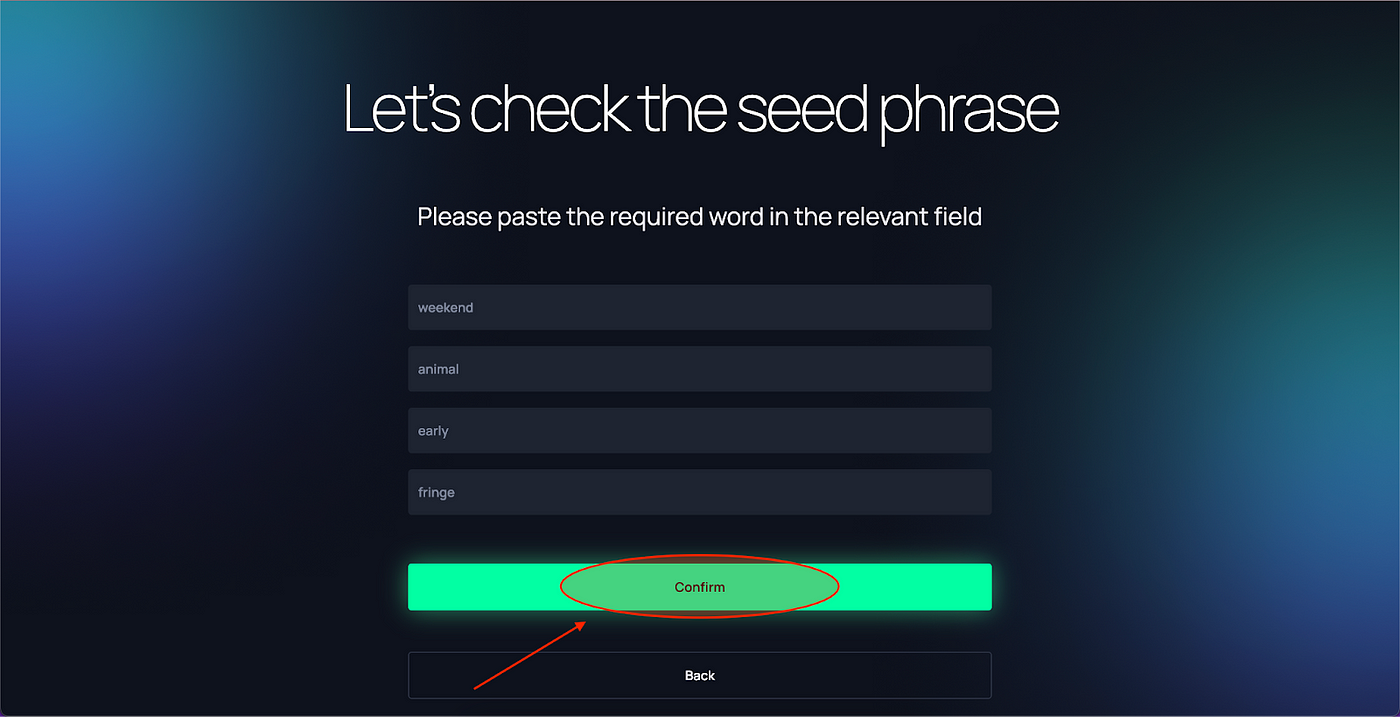
Add the correct word in the correct order in each of the four fields then click ‘Confirm’.
Step 9
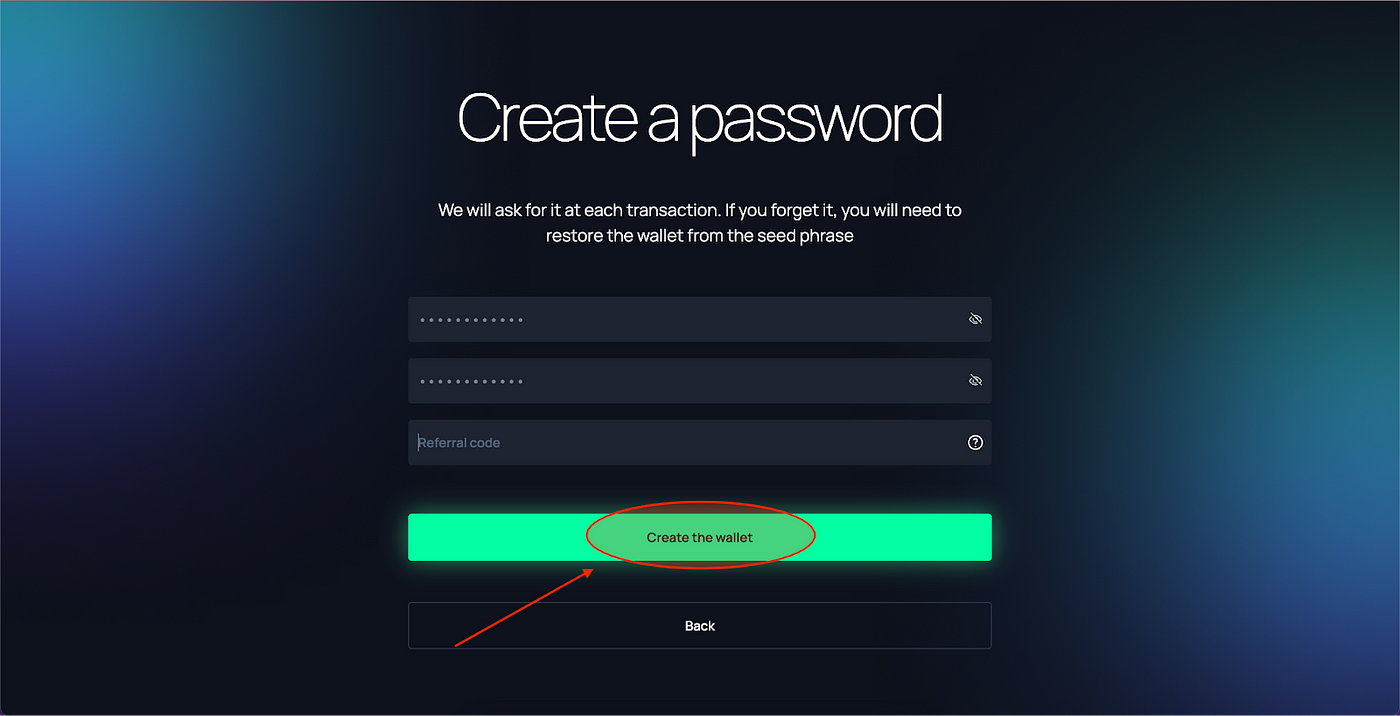
Add password, confirm password and click ‘Create The Wallet’ to proceed.
Also, you can add the referral code you have received from your friend in the Referral Code field: "tXKr8oCkioKRgewq".
Step 10
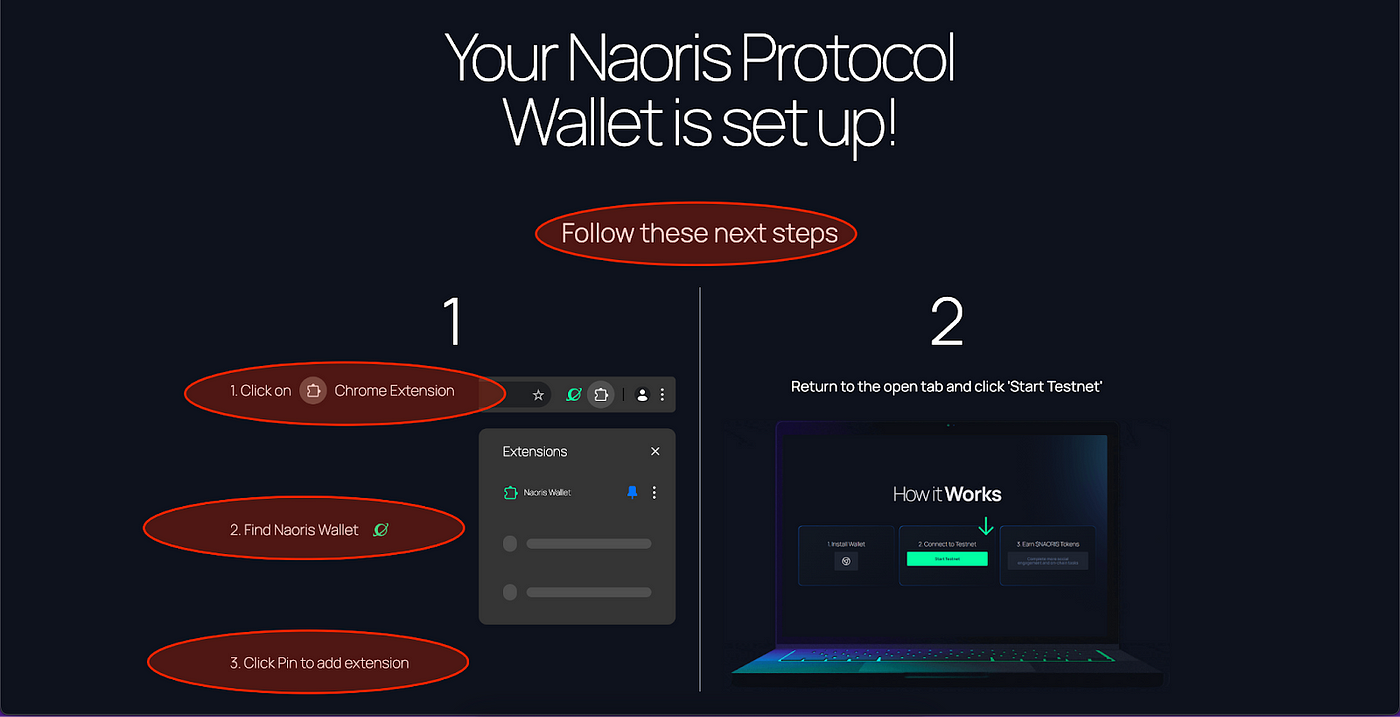
Your wallet is now installed! Now go to the upper right-hand corner of your browser:
- Click ‘Extension’
- Find Naoris Protocol Wallet
- Click the pin icon to pin the extension to the browser
Connect To The Testnet
Step 11
Go back to the testnet website and connect your wallet to the Testnet. Click ‘Start Testnet’.
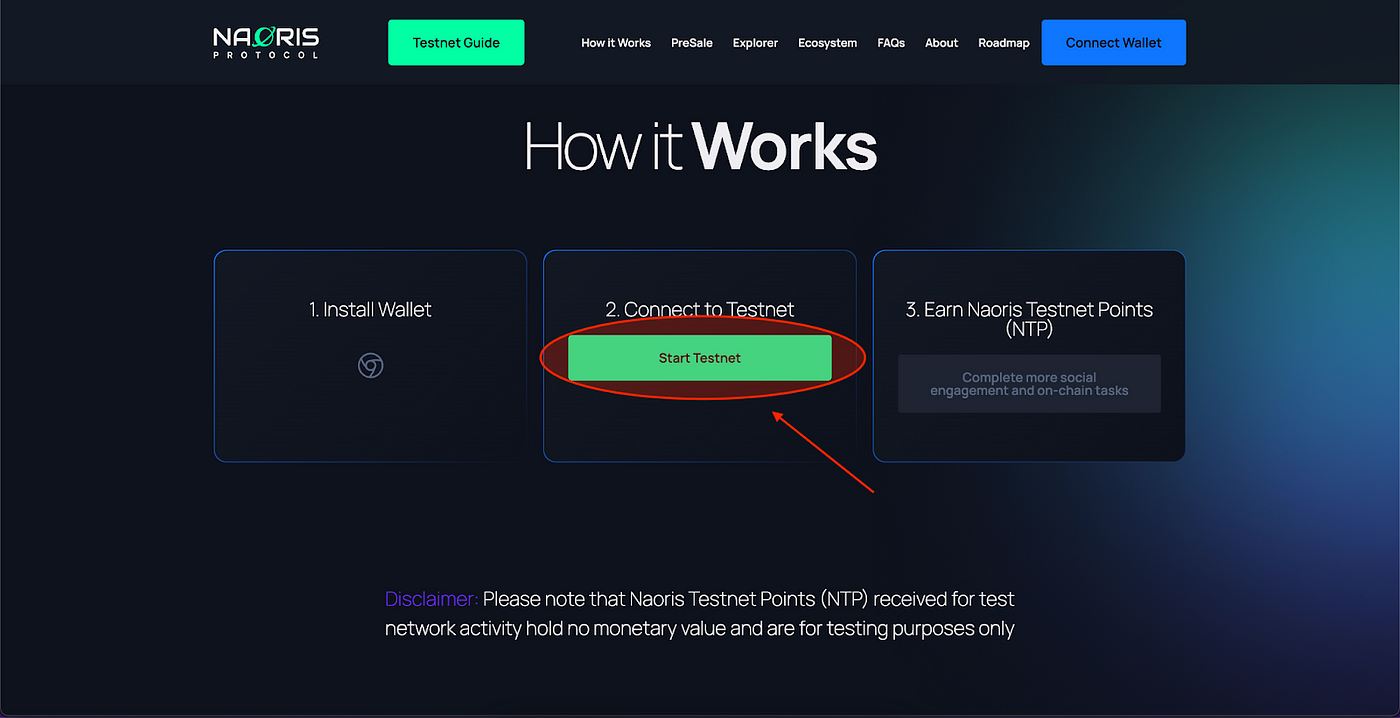
Step 12
Now Login with your Naoris Wallet. Click ‘Connect Wallet’.
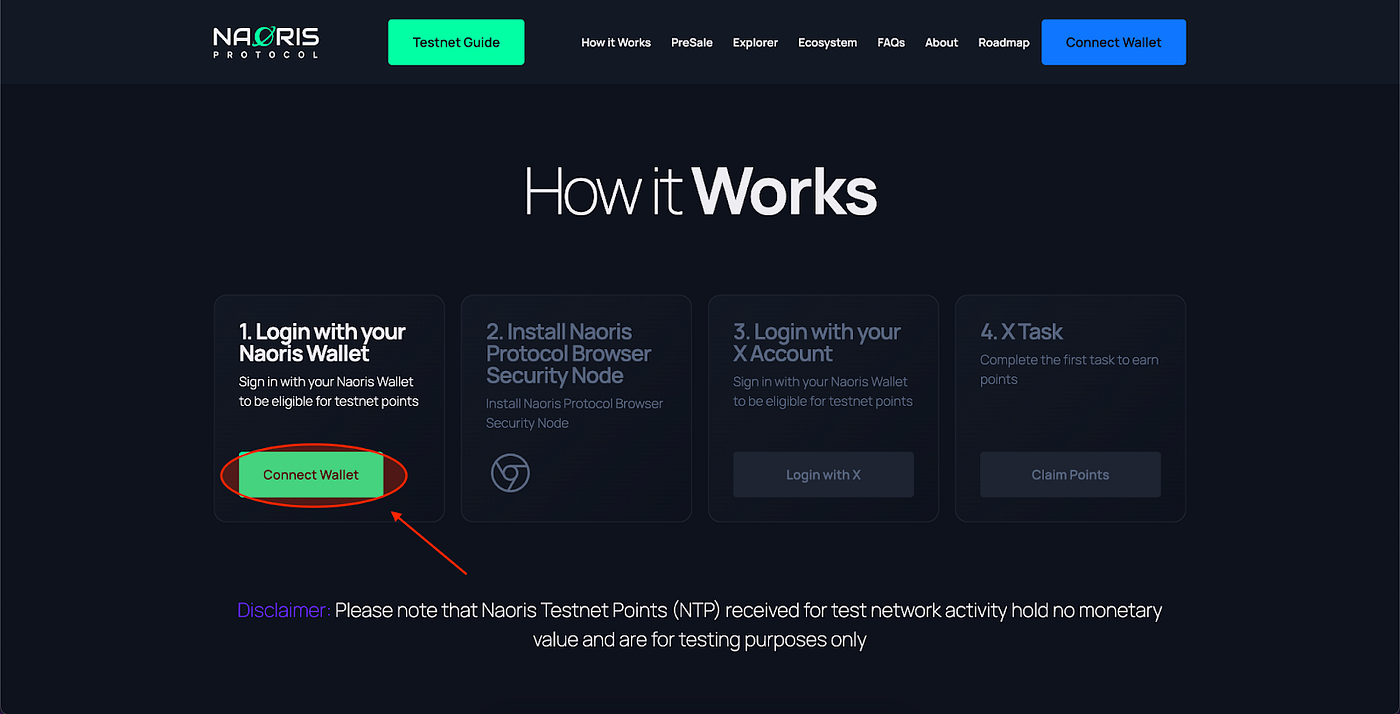
Step 13
Choose which way to connect, click ‘Naoris Chrome Extension’ — Metamask is not available at the moment.
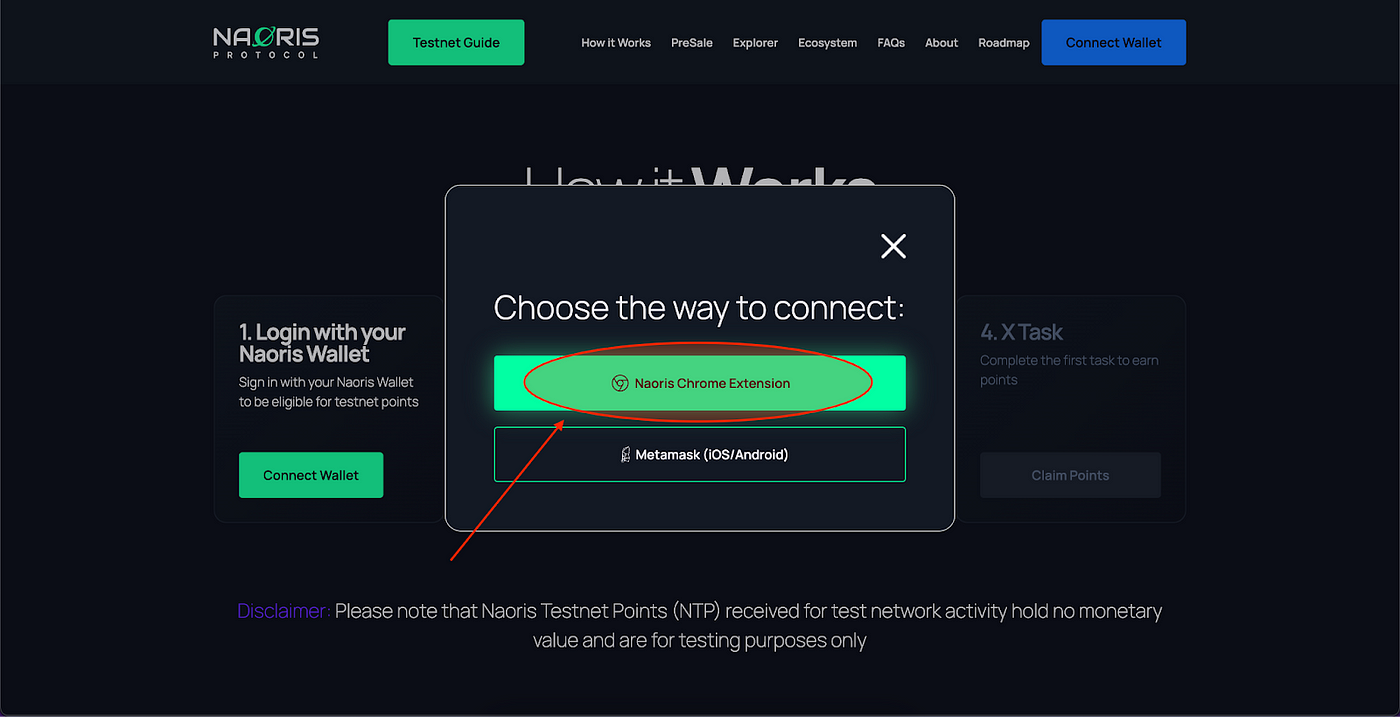
Step 14
Now click on ‘Connect’ to connect the Naoris Protocol Wallet to the testnet.
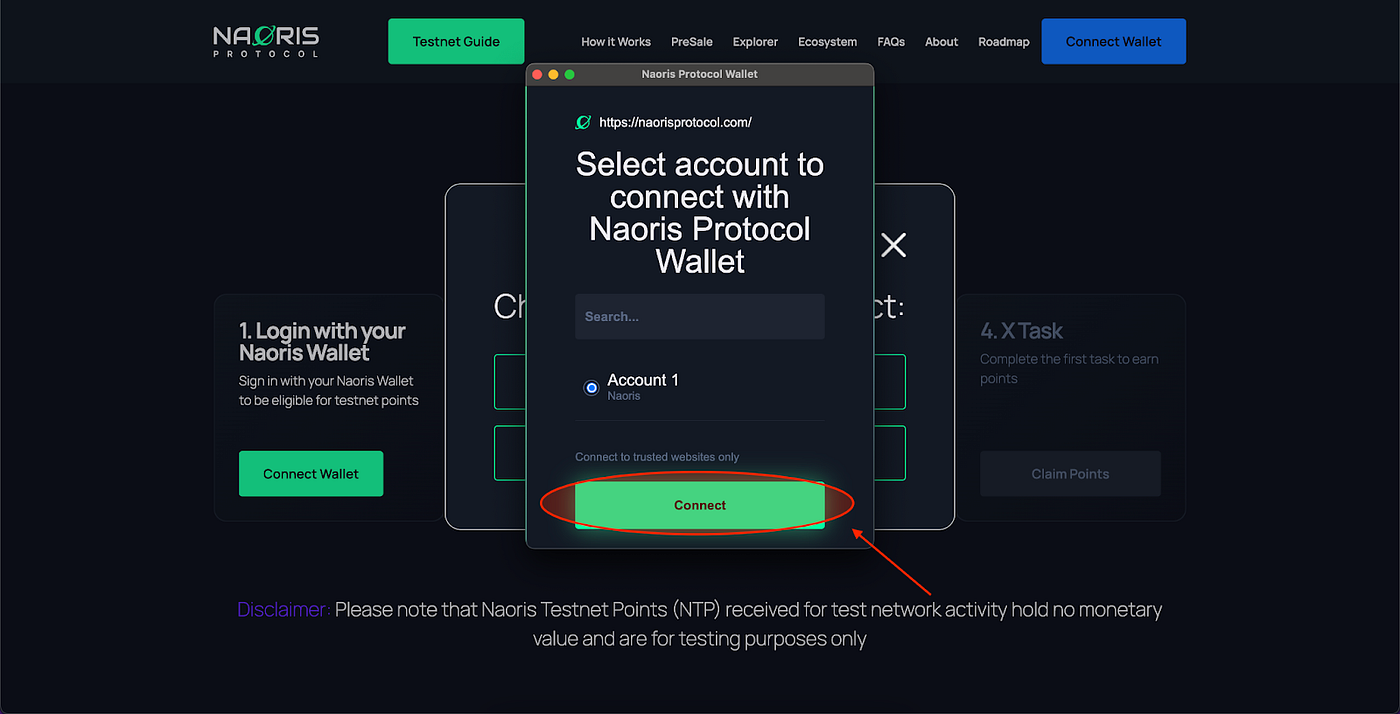
Install The Browser Security Node
Step 15
Click on ‘Install Browser Security Node’ in the ‘How It Works’ section.
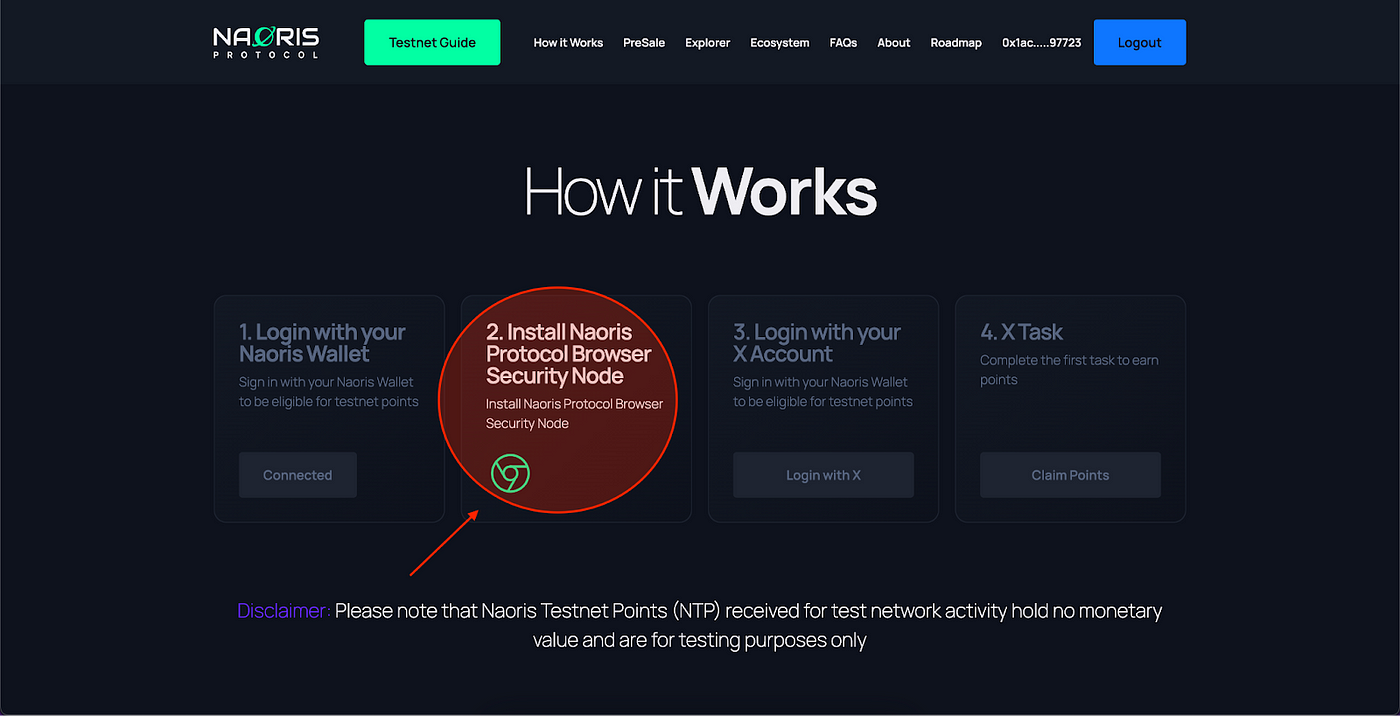
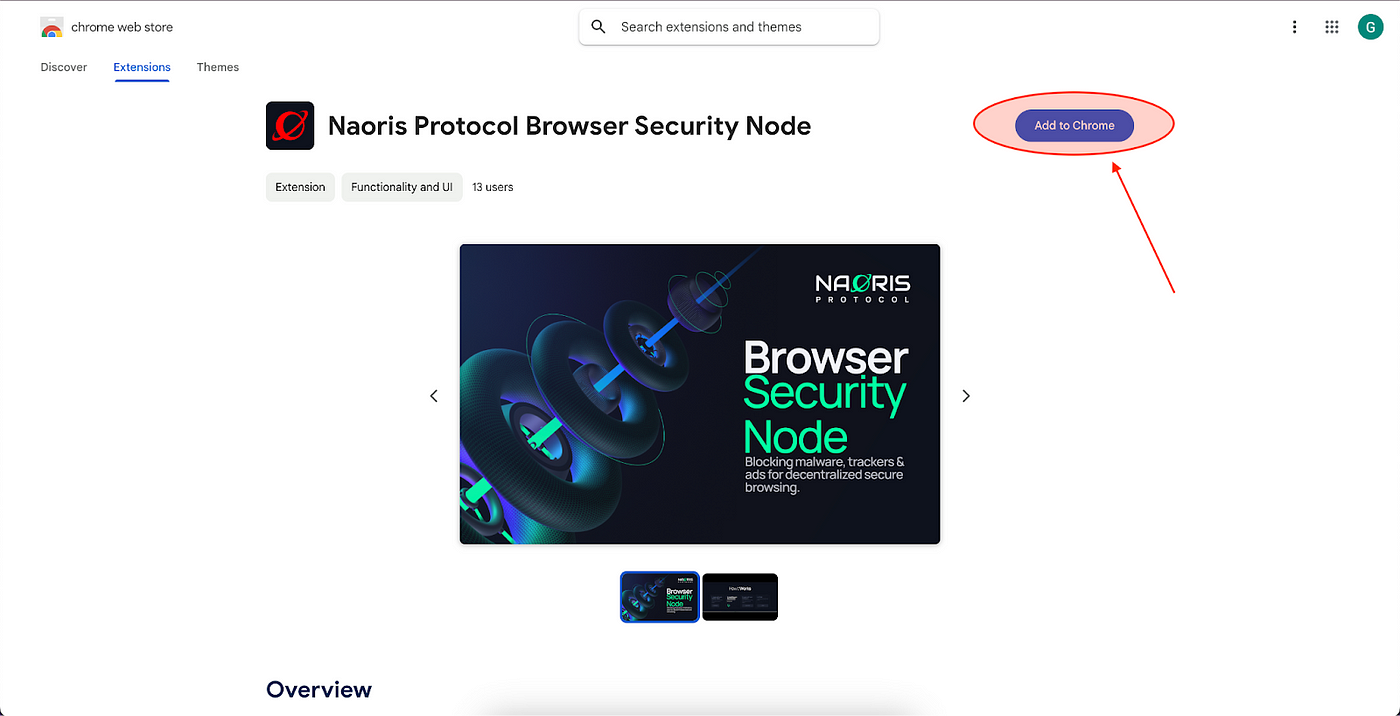
Step 16
Click ‘Add To Chrome’ in the Naoris Browser Security Node Chrome Web Store Page.
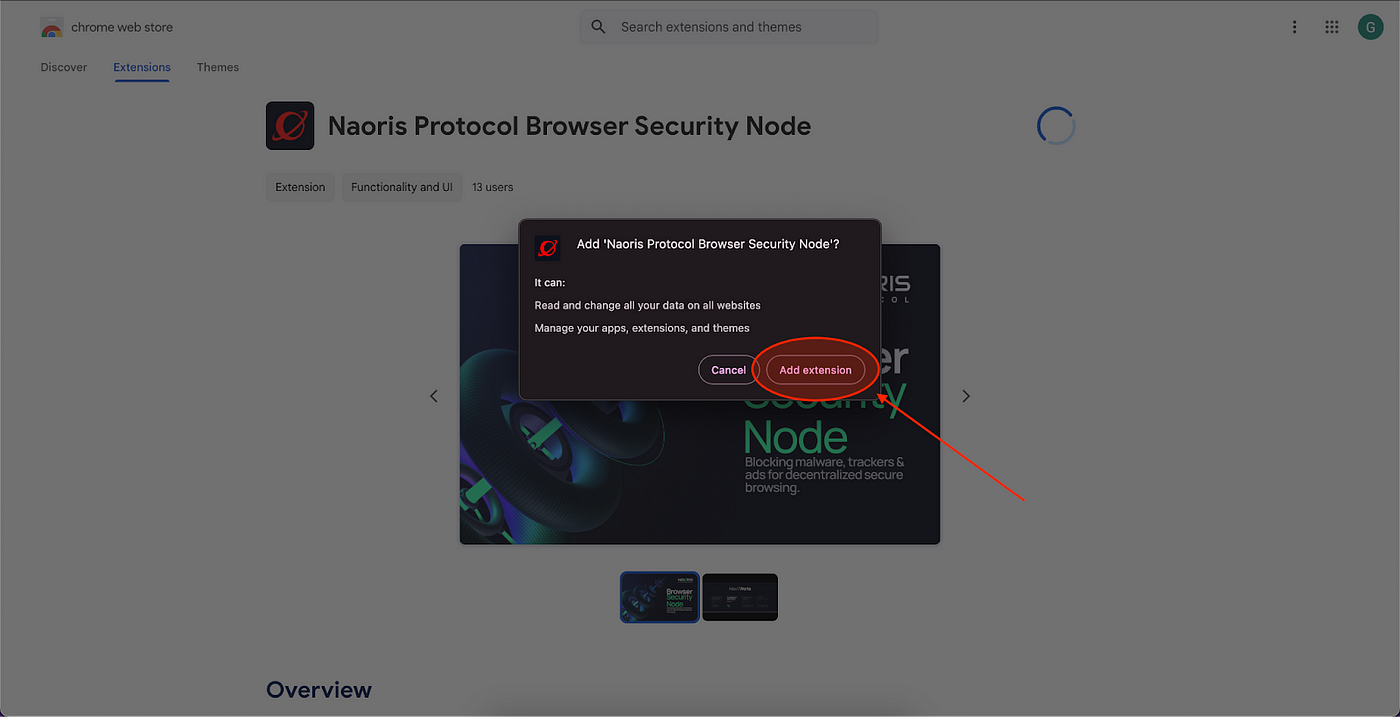
Step 17
Click ‘Add Extension’ in the Naoris Browser Security Chrome Web Store Page.
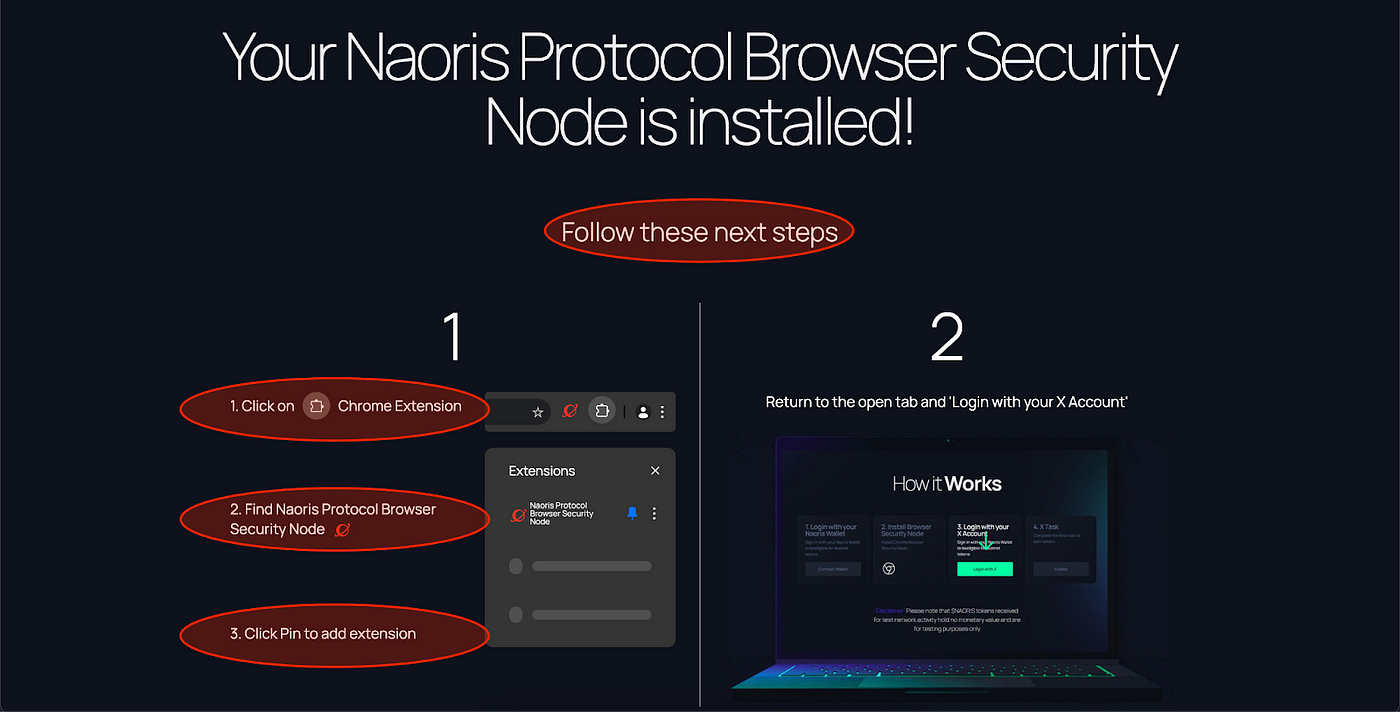
Step 18
Browser Security Node Installed! Follow the steps.
Login With Your X Account
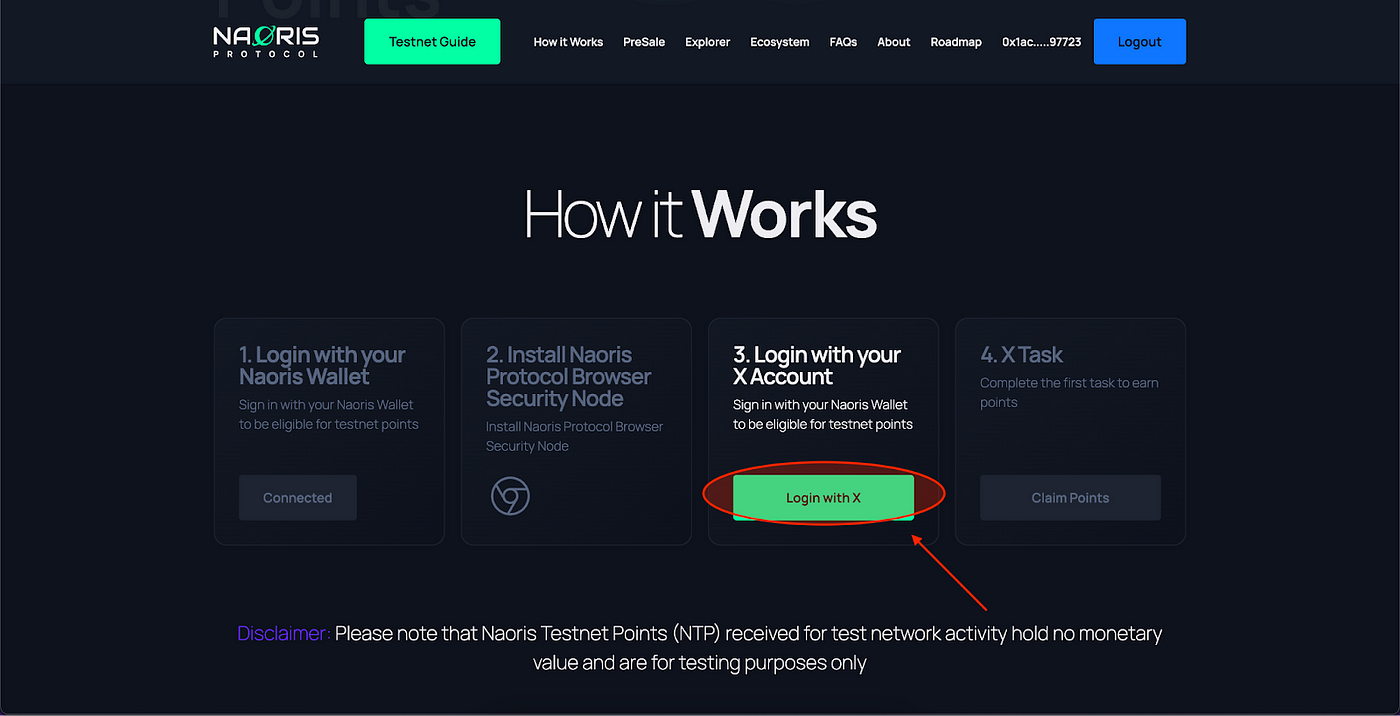
Step 19
Go back to the website and click on ‘Login with X’.
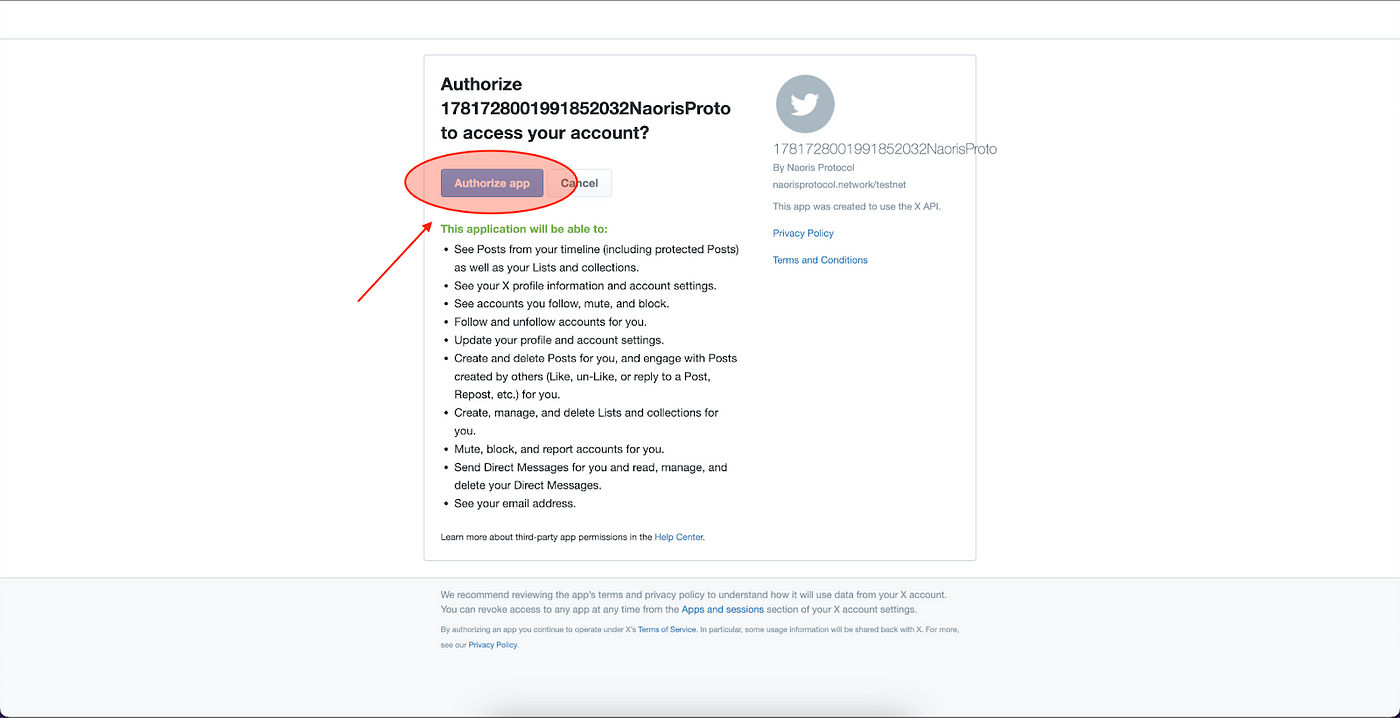
Step 20
Authorize access to your Twitter Account.
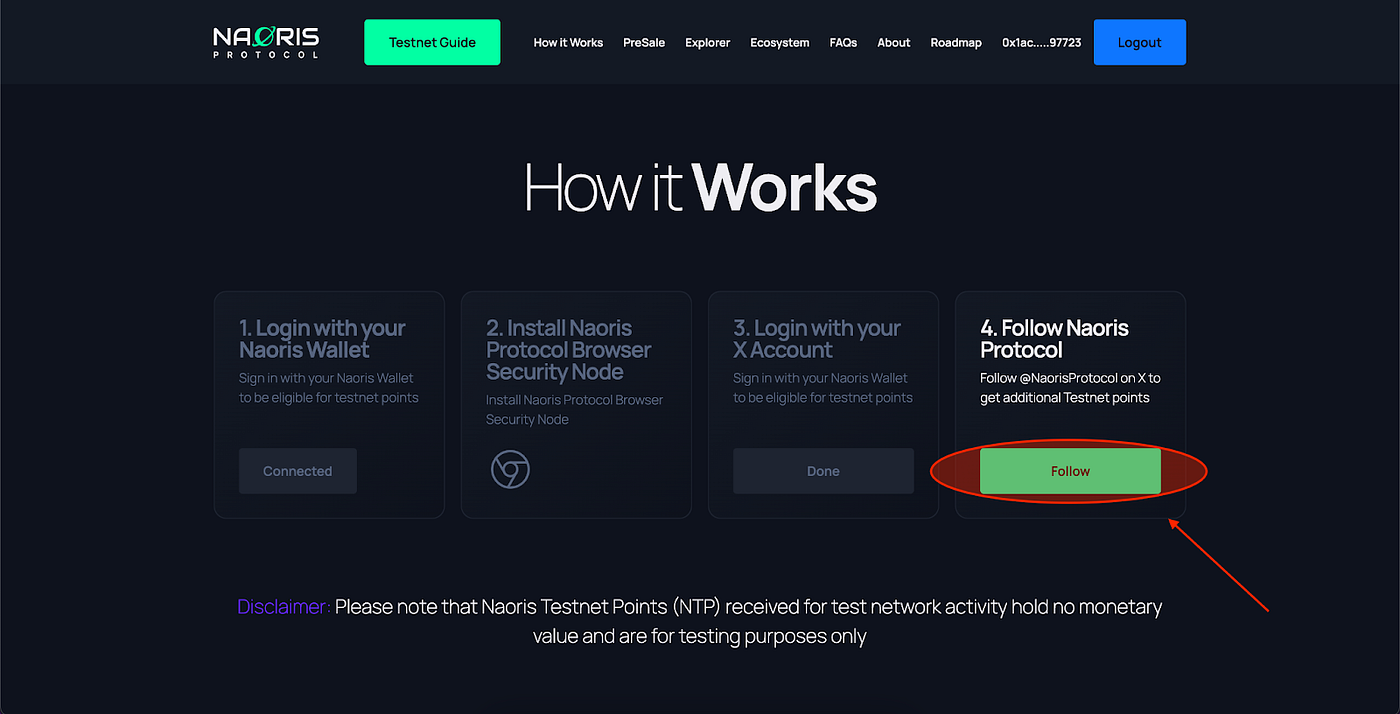
Step 21
Click on ‘Follow’.
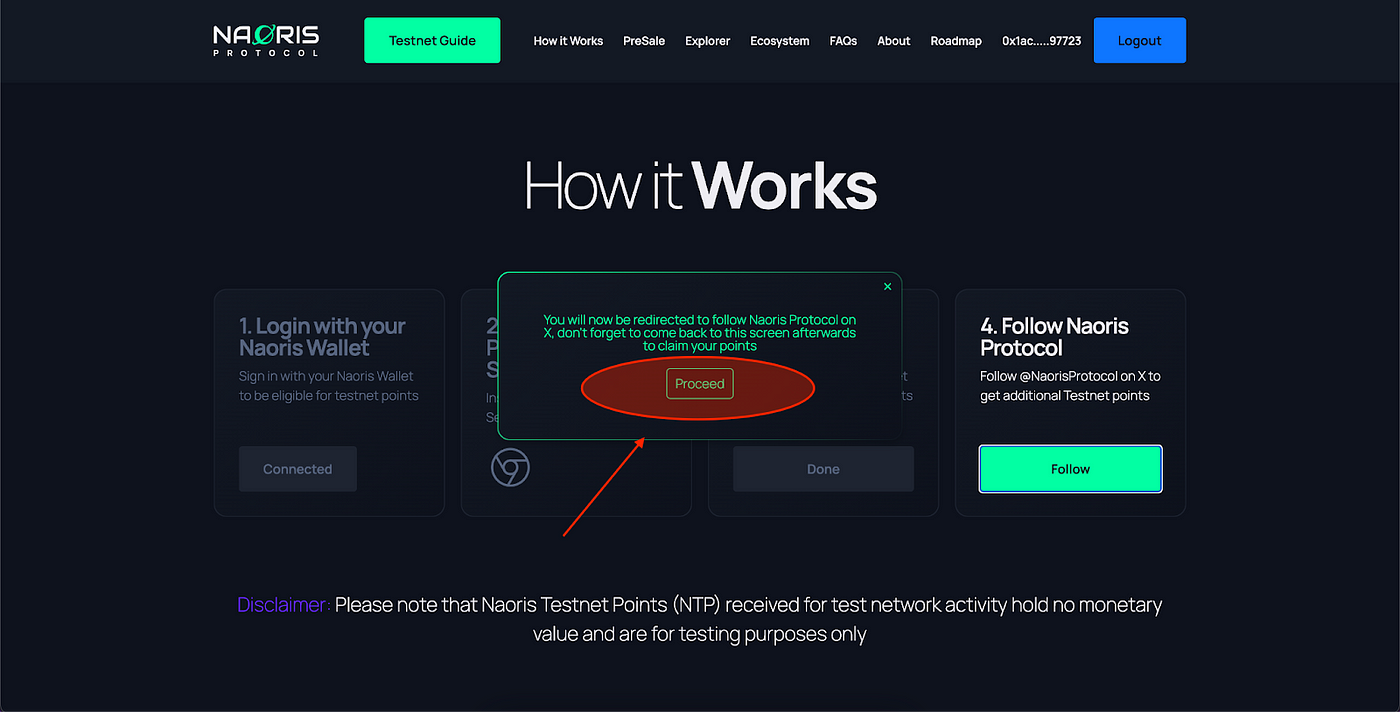
Step 22
Click on ‘Proceed’. Do not forget to come back to this screen when you have followed the Naoris Protocol X account.
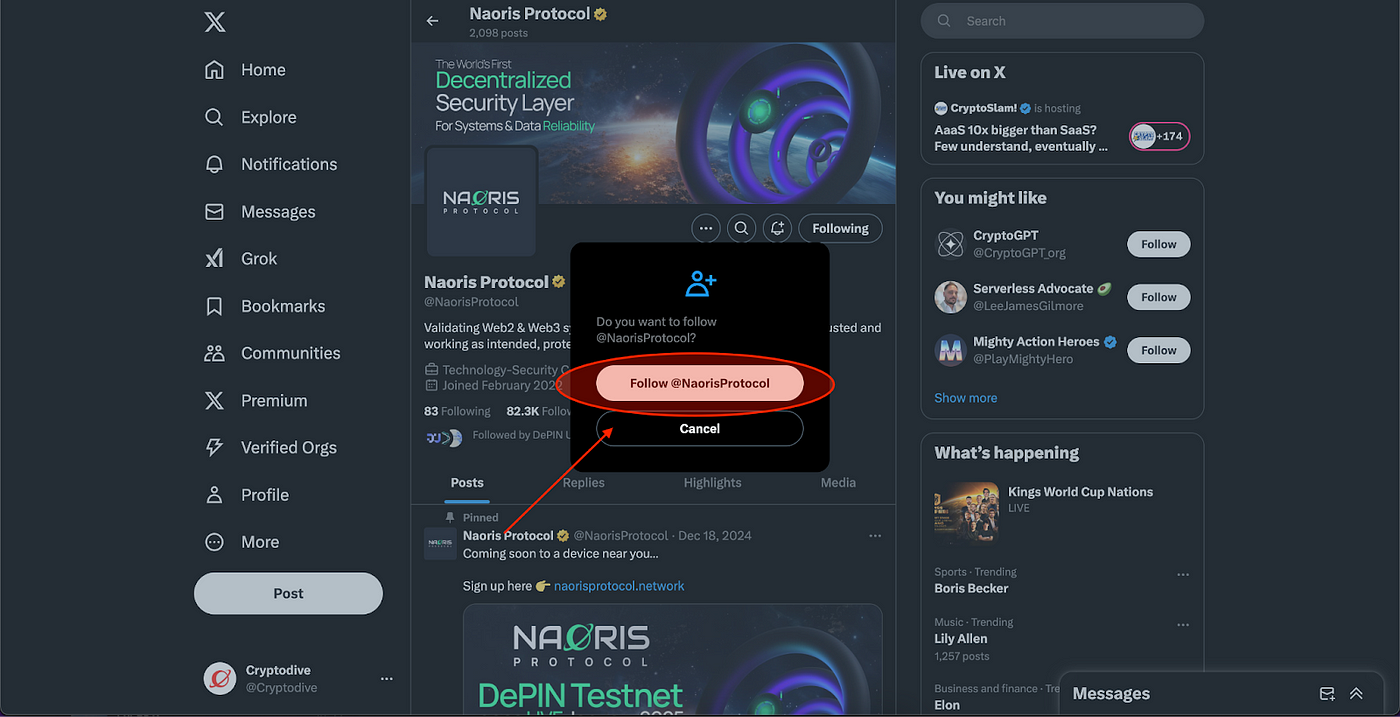
Step 23
Click on ‘Follow @NaorisProtocol’.
Claim Your Points
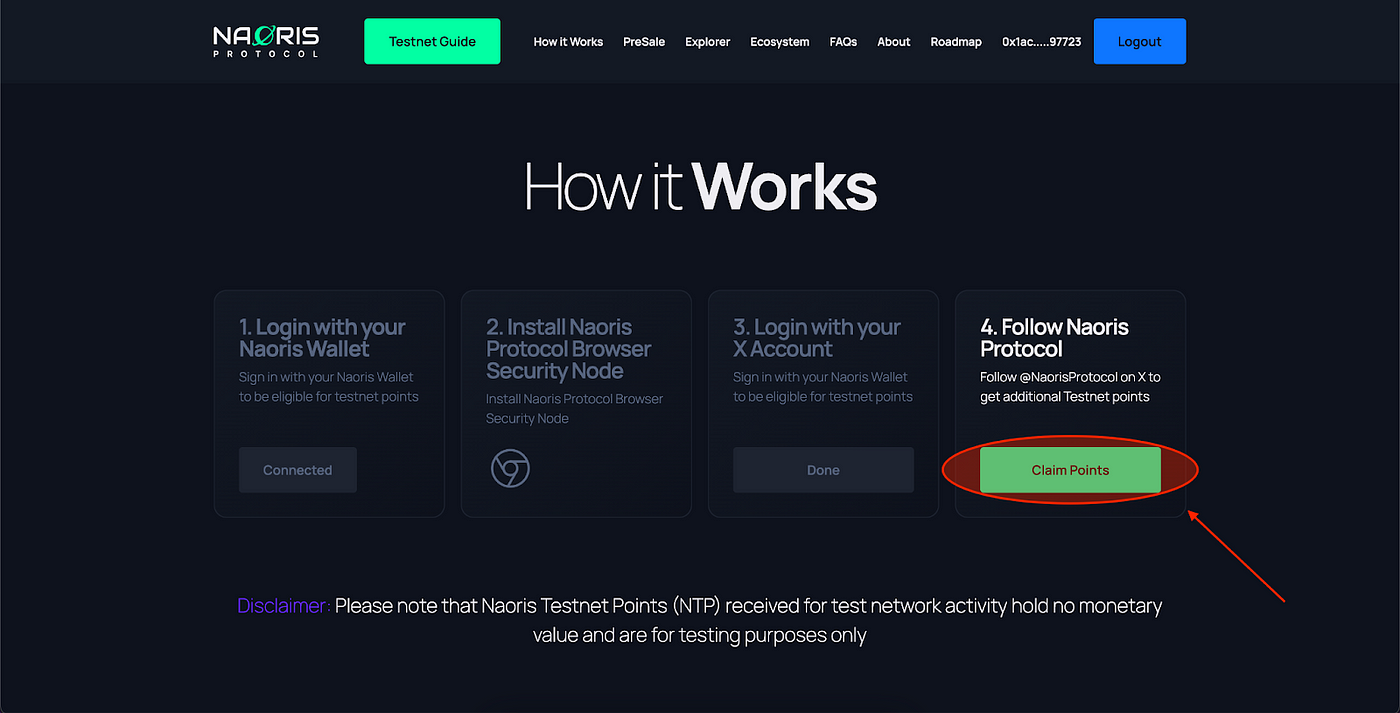
Step 24
Click ‘Claim Points’ to claim your points.
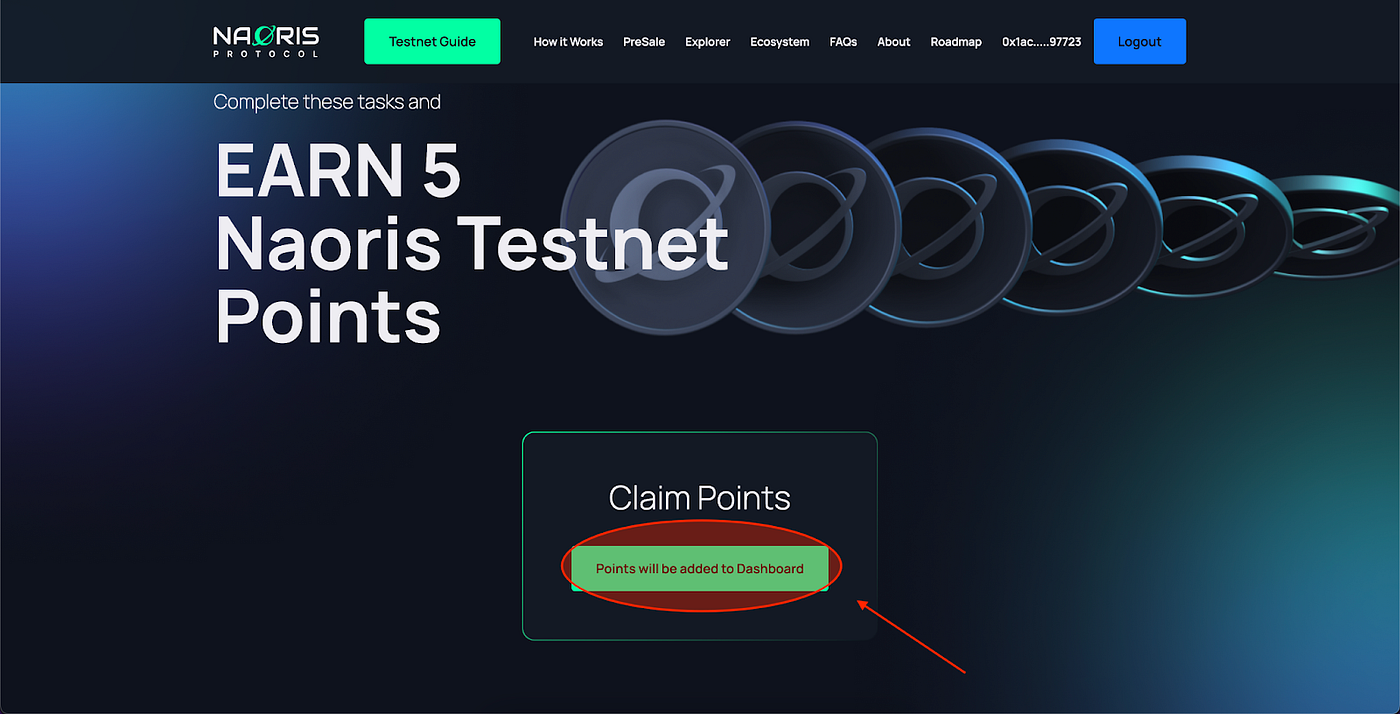
Step 25
Click ‘Points will be added to Dashboard’.
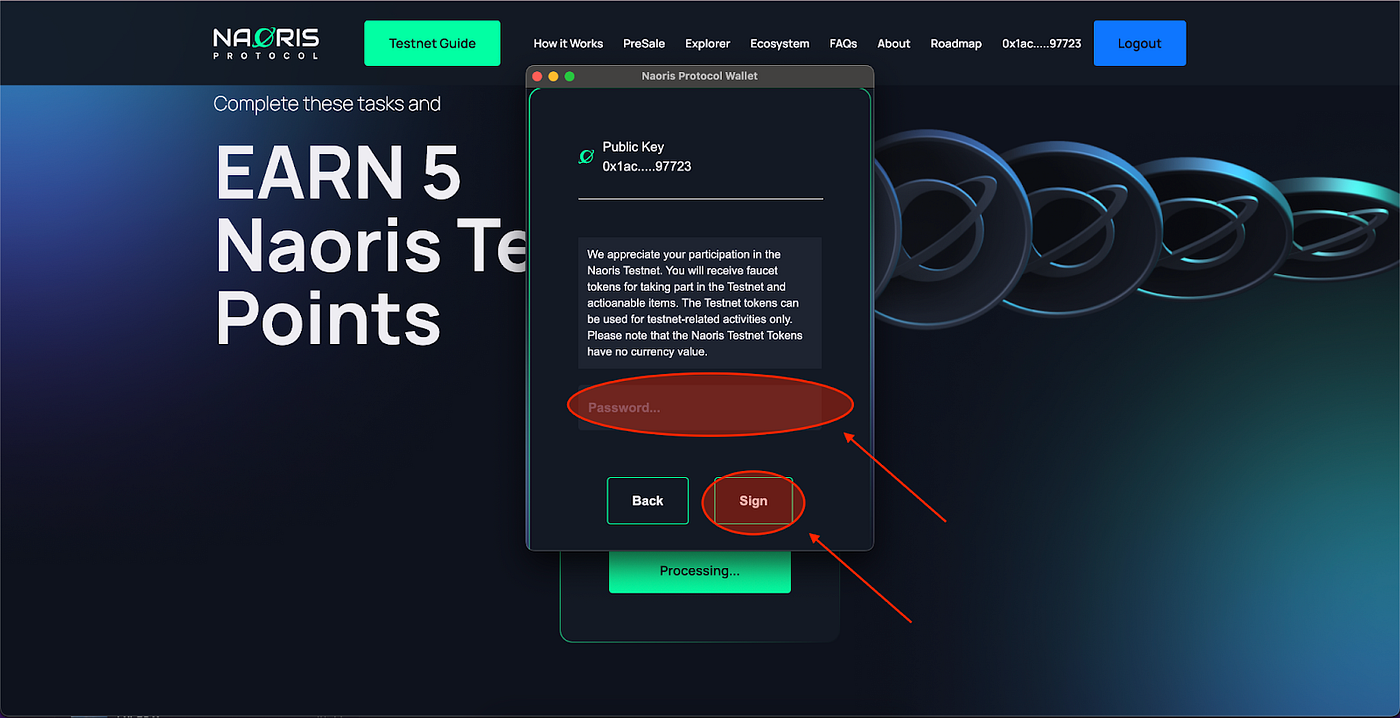
Step 26
Add wallet password and click ‘Sign’ to add the points to your dashboard.
Step 27
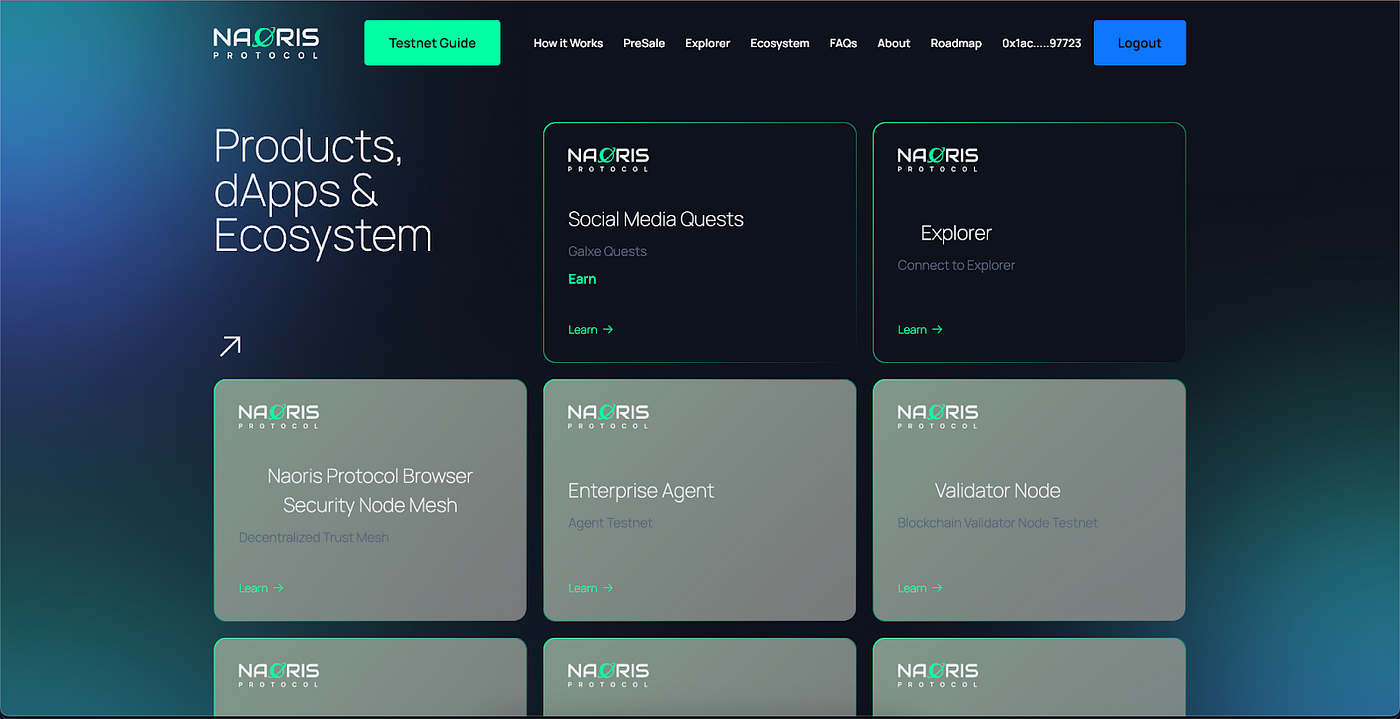
The Download and Install Process is now complete. You will be directed to the Ecosystem page as below.
Step 28
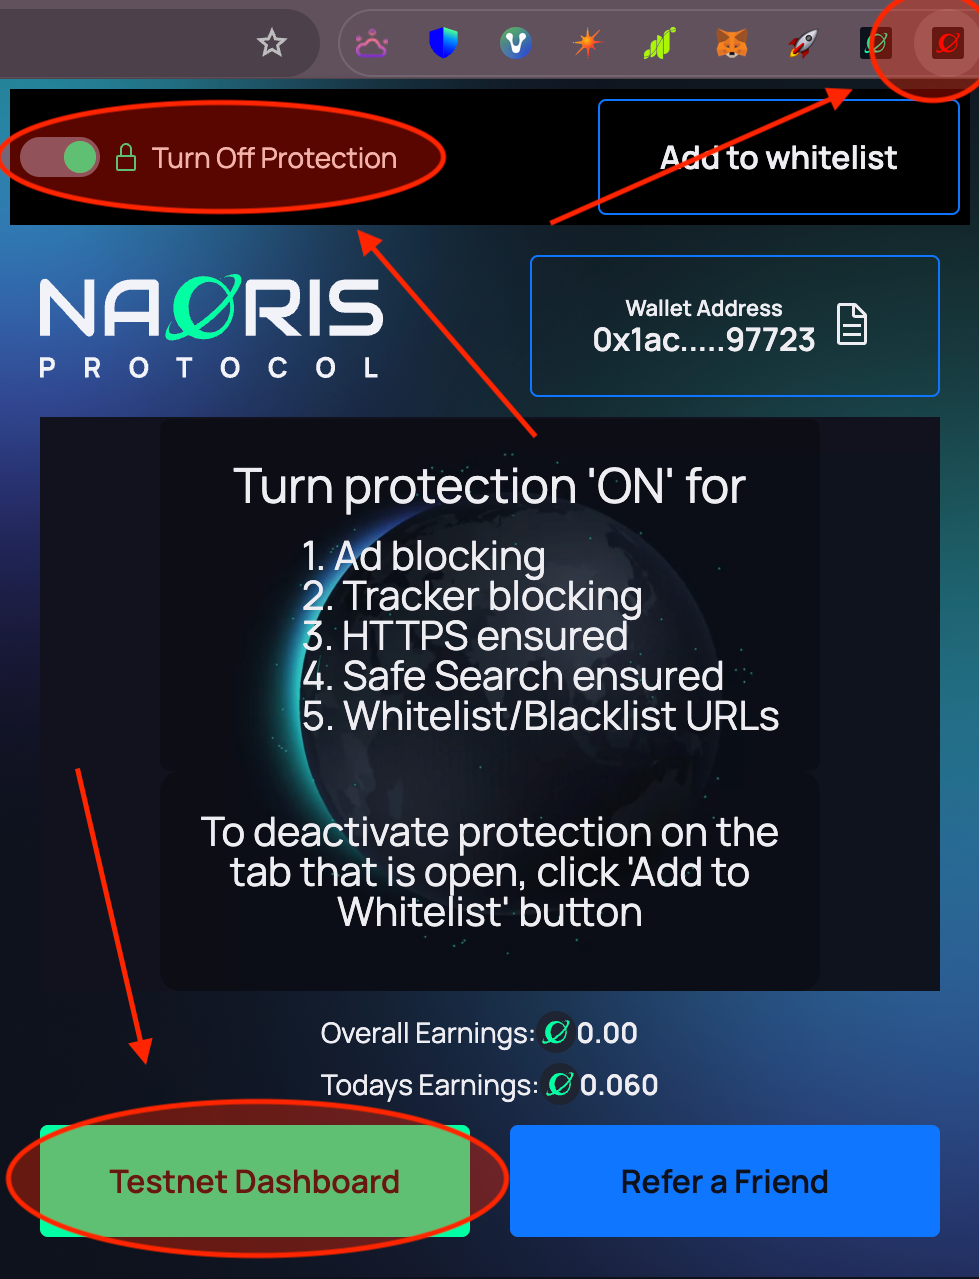
To go to the Dashboard, follow these three tasks:
- Select Browser Security Node Extension in the extension list
- Turn ‘On’ Protection
- Open the ‘Testnet Dashboard’